Oracle Cloud Credentials & Resources

What are "Credentials"?
The CoreSite OCX utilizes programmatic access to create Layer 3 connections to the cloud providers and requires users to provide credentials to establish connectivity.
Why are these needed? When users create a layer 3 connection, the CoreSite OCX also creates the cloud resources below on behalf of the customer. To create such cloud resources, CoreSite requires the user/account Credentials to be provided. These access keys are created in the cloud provider console and can be retrieved after creation. The credentials required are limited to what is outlined below and should not be the user’s root credentials.
Oracle resources created:
- Virtual Cloud Network (VCN)
- Dynamic Routing Gateway (DRG)
- Virtual Circuit (VC)
Helpful Links
The credentials required are limited to what is outlined below and should not be the user’s root credentials. These credentials are created in the cloud provider console and can be retrieved after creation.
Oracle credentials required:
OCI Region | a localized geographic area and where your OCI tenancy exists. Users will need to select the correct region associated with their Tenancy. The subsequent API Credentials are unique to your OCI region. |
OCI Compartment ID | A compartment is a collection of related resources (such as cloud networks, compute instances, or block volumes) that can be accessed only by those groups that have been given permission by an administrator in your organization. Users will need to provide the correct OCI Compartment ID. |
Tenancy OCID | A secure and isolated partition within Oracle Cloud Infrastructure (OCI) where you can create, organize, and administer your cloud resources. When you sign up for OCI, a tenancy is created for your company. Tenancy also refers to the root compartment that contains all of your organizations compartments and other OCI resources. Users will need to provide the Tenancy OCID. |
User OCID | This value represents the OCID of the user submitting the request. Oracle assigns each user a unique ID. Users will need to provide the User OCID. |
Fingerprint | This value represents the fingerprint of the Oracle key pair. Key pairs are used to authenticate a remote user and contains a private key and public key. Users will need to provide the Fingerprint. |
Private Key | This field represents the private key portion of the Oracle key pair. Users will need to provide the Private Key. |
Helpful Links:
Steps to obtaining your Oracle Cloud Service Account Credentials:
OCI Region
- Log into the Oracle Console using your Cloud Tenant, username, and password. You will be redirected to the Oracle Cloud home page.
- The current tenancy region can be located in 2 ways:
- Navigate to the top of the page and locate the region which is displayed in the URL:

- In the top right corner of the page, locate the region display name:
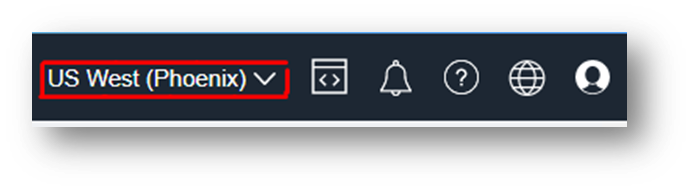

- Navigate to the top of the page and locate the region which is displayed in the URL:
OCI Compartment ID
- In the Oracle Portal, navigate to the top left corner of the screen and click the menu icon.
- Click on “Identity and Security”
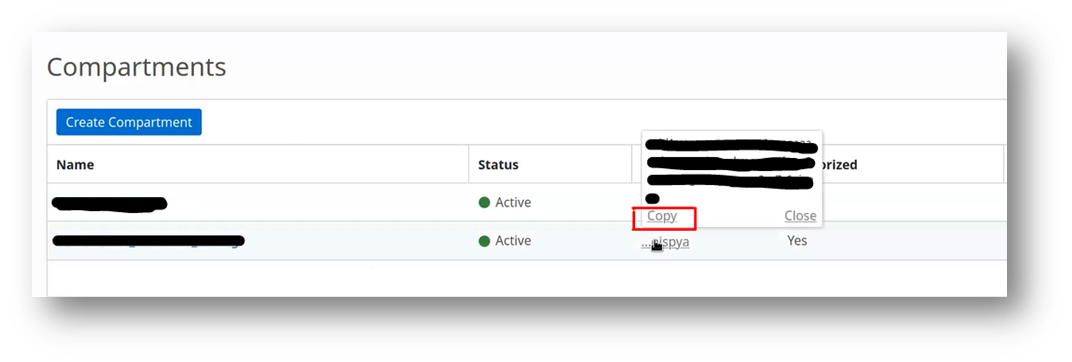
- Click on “Compartments”
- A list of Compartments will be presented on the page. Locate the compartment you wish to use and hover over the “OCID” column. Click the “Copy” hyperlink that is presented in the modal window that appears.
Tenancy OCID
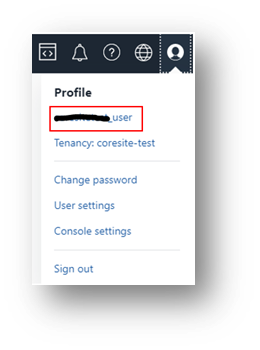
- In the Oracle Portal, navigate to the top right corner of the screen and click the profile icon.
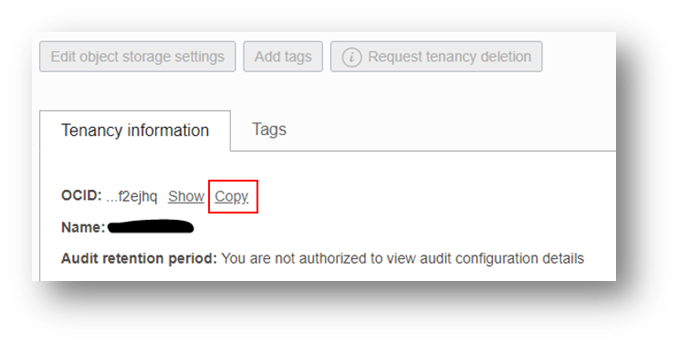
- Click on “Tenancy: “user””. New page will appear containing your tenancy details.
- Under the “Tenancy Information” section, in the OCID field click on “copy”. Your user OCID information will be copied.
User OCID
- In the Oracle Portal, navigate to the user profile on the top right corner of the screen and click on the picture.
- Click on the user name. A new page will appear containing your user details.
- Under the “User Information” section, in the OCID field click on “copy”. Your user OCID information will be copied.
Fingerprint and Private Key
- In the Oracle Portal, navigate to the user profile on the top right corner of the screen and click on the picture.
- Click on “User Settings”
- Navigate to the lower left hand corner. Under the “Resources” section, locate and click on “API Keys”
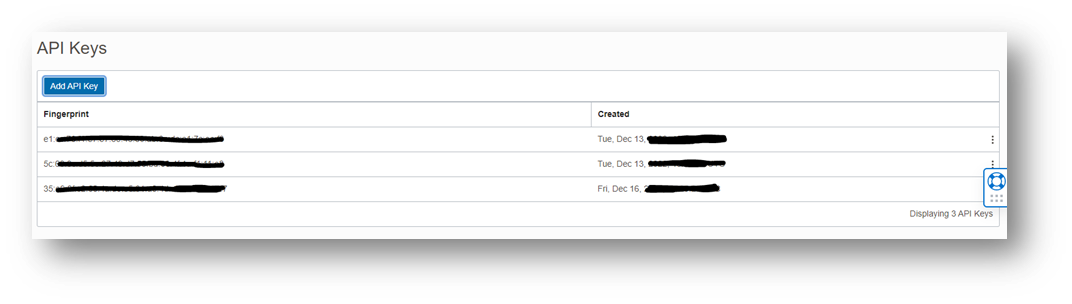
- A list of API keys will be displayed in the table. Click “Add API Key”.
Note: adding an API key will generate a new set of API keys. If you wish to use an existing API Key, you may do so. - A modal window will appear. Click/select “Generate API Key Pair”
- Click “Download Private Key”. NOTE: the private key can be only downloaded One Time. Once downloaded, ensure that the key is stored in a secure location.
- Click “Add”

- A configuration file will appear in the modal window containing the required API Keys including the Fingerprint. You may copy the Fingerprint here if you wish. Click “close”
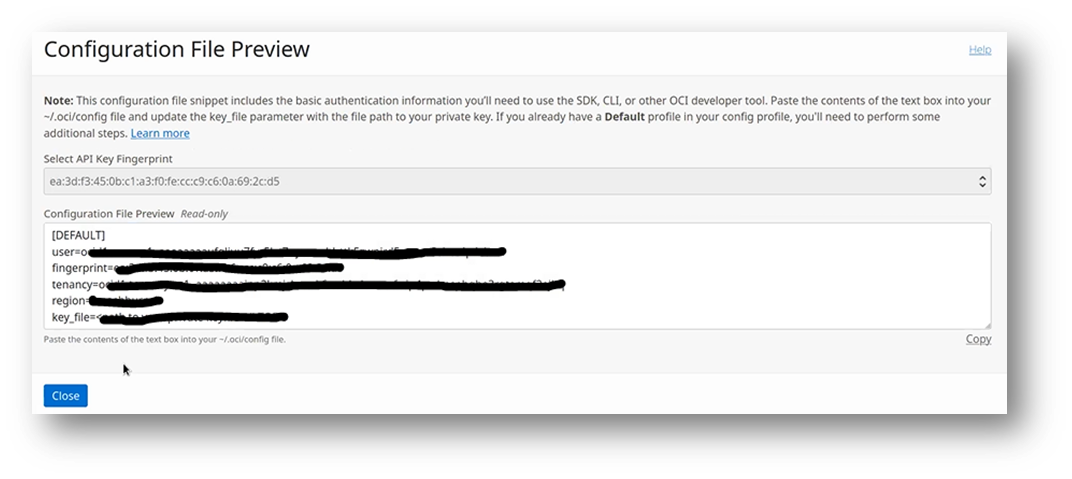
- You may also obtain the fingerprint in the API key table if needed.