Creating EVCs to an OCX Participant

Creating an EVC between your CoreSite OCX environment to a Participant
User's may create EVC connections to other CoreSite customers via the OCX. These EVCs can span across different markets or the same market. This article outlines steps needed to create connection from your environment(s) to another tenant on the OCX (OCX Participant).
NOTE: At this time, only Layer 2 EVCs are supported between OCX participants.
NAVIGATING TO THE EVC ORDER FORM
- Follow Steps 1 to 4 in the “ordering OCX services” section to navigate to the Port ordering page.
- Click on the “EVC” tile and click “continue”.
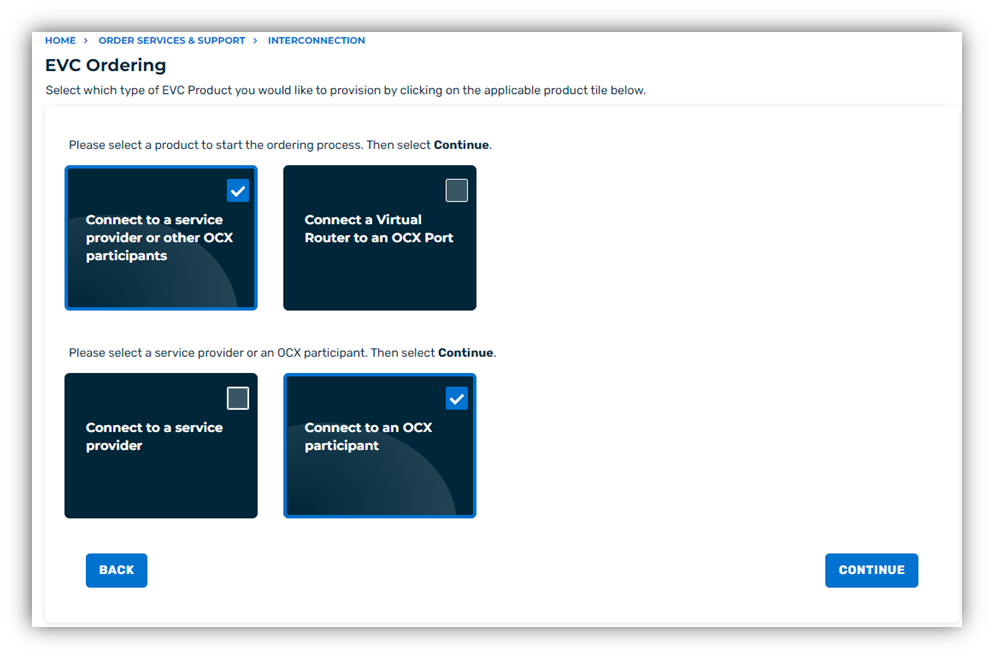
- On the next screen, select the tile that displays “Connect to a service provider or other OCX participant.”
- Select the tile that displays “Connect to an OCX Participant” and click “Continue”.
COMPLETING THE EVC ORDER FORM
Part 1: Fill out the required data fields in the EVC order form:
- Select Account.
- Select Site.
- Confirm Contact detail information.
- (Optional) Add additional contacts.
- Select the target account.
- Select the target port.
- Select the buyer port.
- (Optional) Specify a VLAN.
- Select the desired Service Rate.
- Provide a unique name for your EVC.
- (Optional) provide a reference label and number.
- Provide a Description. If a description is not needed then please enter “N/A”.
- Agree to the terms and conditions.
- Click “Submit Request”.
After completing Step 14, the order will be submitted and automated provisioning will begin. No other action is required at this time.